Setting up custom email on a Google domain
This is a guide on setting up custom email address using a Google domain.
First thing is to register a domain through Google domains. Once domain has been registered, set up email forwarding in Google domains email setup page. This will allow any emails sent to your custom email to be forwarded to your existing address. Last thing to set up would be to add your new email as an address you can reply from.
Below we will provide steps on how to set up [email protected] to be forwarded to [email protected] and send emails from our [email protected] email but as [email protected].
Buy a domain
Go to domains.google and register your domain.
Set up email forwarding
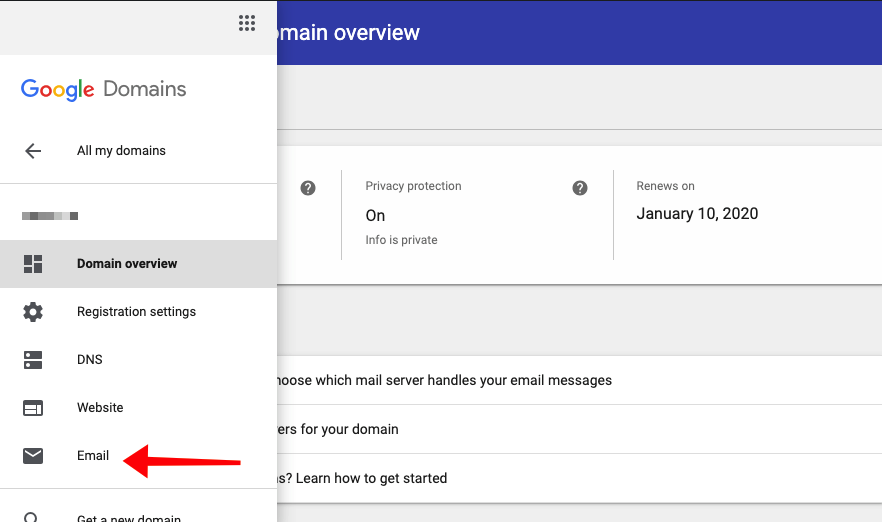
Go to My domains page and click on MANAGE next to your domain.
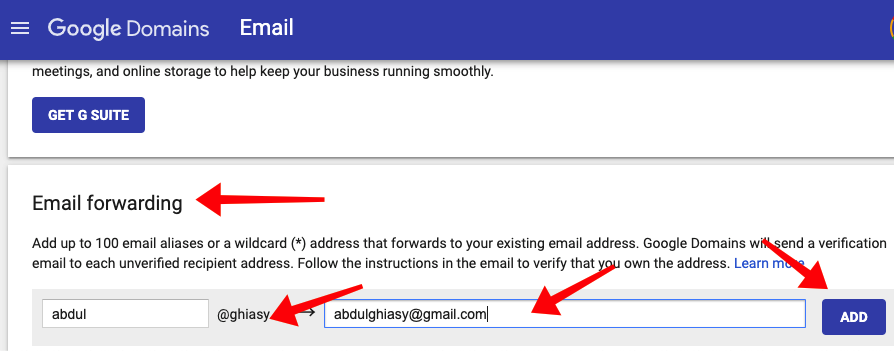
From Main menu click on Email. Scroll down to Email forwarding and add the email you want (in our example we are going to forward [email protected] to [email protected]).
Set up new address so it can be used to send emails
Now that the domain and forwarding is set up, we can start to configure existing gmail account so we can use it to send emails as the new address.
Create an App password
In Gmail, click your username/icon in the upper right corner to bring up the user menu. Under Security menu, click on App passwords.
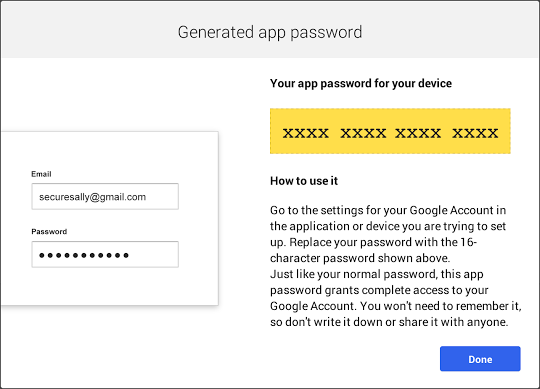
For the device, select Other (Custom name) and enter your new email (in our example it will be [email protected]). Click GENERATE and make sure you copy the app password because you will not be able to recover this once you close/refresh the window.
Set up gmail to reply with new email
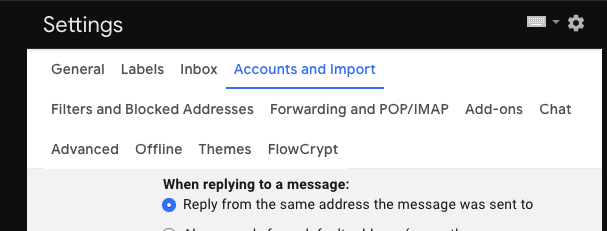
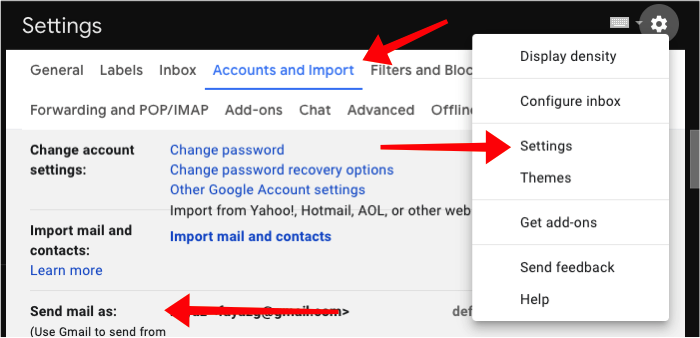
In gmail Settings screen, click the Accounts and Import tab. Scroll down to Send mail as and click Add another email address.
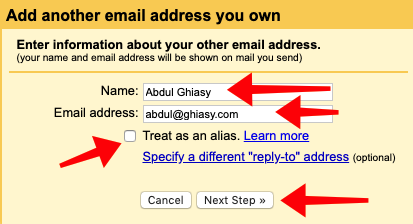
Name is what everyone will see when you send mail. Email address has to be your new address with the new domain (in our example we are using [email protected]).
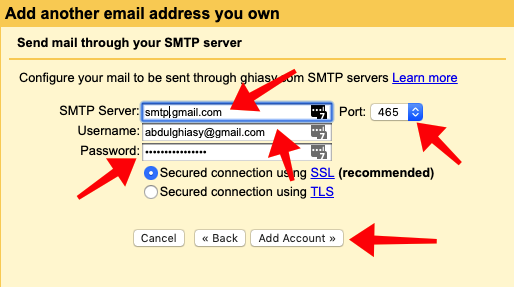
We are going to send email from gmail using our existing address so we have to point to the correct SMTP server, in this case it will be smtp.gmail.com. We are going to change the port and use the recommended SSL setup. Username will be your existing gmail account you are logged into and Password will be the App password which was created above.
You will get an email from Gmail Team with a confirmation request which you must do. This email will also include the confirmation code which will be requested after you click Add Account.
Once account has been successfully added, you will be able to send/receive emails using your new address.
To write new emails using your new address, click the triangle next to From address and choose the account you just added.
EXTRA: set up gmail to reply from the same address the message was sent to
Gmail can be set up to use the receiving address as the reply address. This is in gmail Settings -> Accounts and Import under Send mail as.